Thanks to the user-friendly design of Google Docs inserting and editing a table is fairly straightforward. By following a few easy steps, you can insert and edit tables in Google docs and start organizing your data, images, and other items in no time. Whether you want to create a new table or edit an existing one, this guide will help you achieve both of these goals.
Inserting a table in Google Docs
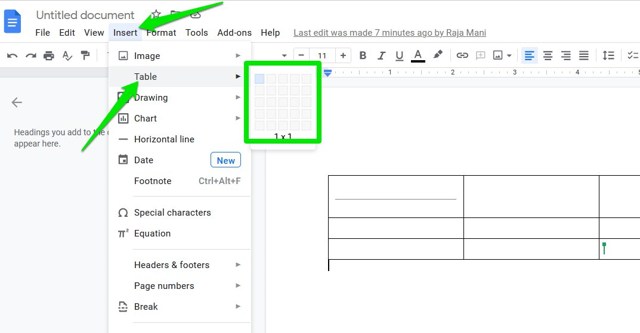
Once you have signed in to your Google Docs, open the file you want to add a table to or create a new file if you’re going to create a new document and follow the below steps: Step 1. With the document opened, move the cursor to the location where you want to insert the new table and click on the location. Step 2. Now click on the Insert button at the top and select Table from the drop-down menu. Step 3. Once you click on Table, you will be provided with the option to choose the number of rows and columns you want to add to the document. Make your selection as needed.
After completing these steps, you will have a table in your Google Docs in the location you selected at the start of the process.
Editing a table in Google Docs
If you have an existing table in your Google Docs that needs to be modified, you can easily do that by adding rows/columns to it or deleting them. Here is how you can perform these common edits to your Google Docs table: Adding rows/columns to a table: Adding rows and columns to an existing Google Docs table is simple. All you have to do is: Step 1. Select a cell in your table and right-click to open the context menu. Step 2. Choose between Insert Row Above, Insert Row Below or Insert Column Left, Insert Column Right to add a row/column in your desired location.
Deleting rows/columns in a table: If you have extra rows/columns in your Google Docs table that you want to delete from the table, you can do that in these simple steps: Step 1. Select a cell in the row or column you want to delete and right-click to open the context menu. Step 2. Select the Delete Row or Delete Column option depending upon whether you want to delete a row or column.
Removing the table from Google Docs
It is not uncommon that you might need to remove the whole table from Google Docs. However, you should be sure about removing the table before you proceed to delete it. Removing a table from Google Docs is similar to editing the table, and it can be done in two steps: Step 1. Right-click anywhere in any cell of the table to open the context menu. Step 2. Find and click on Delete Table to delete the table from your Google Docs.
Note: You can click on the undo option available under the File button to undo the table deletion if needed.
How to add tables in Google Docs mobile apps
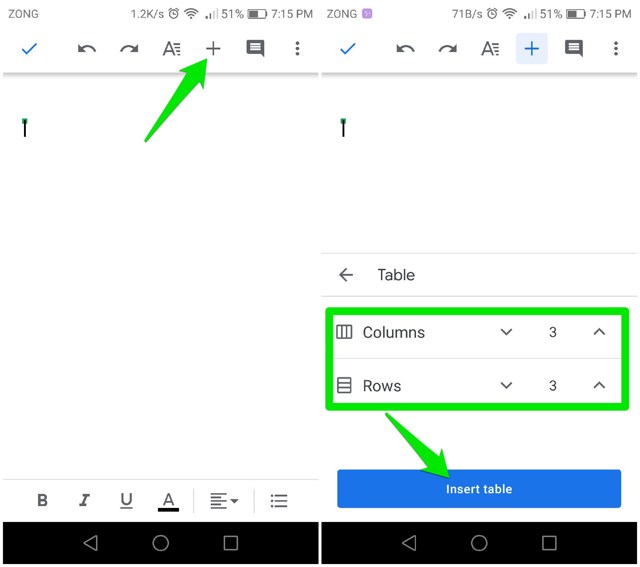
If you are editing your Google Docs on your Android/iOS device instead of a desktop, you can still add tables to your document. Adding a table to the Google Docs app: Once you have the document opened in your Google Docs app you can follow these steps to add a table to it: Step 1. Tap on the location in the document where you want to add the table. Step 2. Now tap on the Add button available on the top and select Table. Step 3. Pick the number of rows and columns you want, tap on Insert Table, and you now have a table in your Google Docs app.
Ending thoughts
If your work requires you to use Google Docs quite often or even if you are a student who frequently uses this Google service, it helps to know how you can add tables to your documents. I hope this article helped you in inserting and editing tables in your Google Docs file.